
Soldering is a fundamental pillar of modern engineering, bridging the gap between abstract circuit designs and functional electronic reality. Whether you are a hobbyist assembling a custom mechanical keyboard, a student learning the ropes of electrical engineering, or a professional technician performing board-level repairs, the ability to create a clean, conductive, and mechanically sound solder joint is an essential competency.
Despite its importance, soldering is frequently misunderstood as a purely mechanical task. In reality, it is a delicate marriage of thermodynamics, chemistry, and manual dexterity. For the uninitiated, the process can feel overwhelming—a "four-handed" dance involving heat, molten metal, and fragile components. However, even the most seasoned engineers occasionally fall victim to common pitfalls that compromise the integrity of their work. Understanding these errors is not just about troubleshooting; it is about refining your technique to ensure longevity, conductivity, and safety.
1. The Thermodynamics of Failure: Using the Wrong Temperature
The most common point of failure for beginners is the misuse of temperature control. Modern soldering stations are precise instruments, yet many users treat them as simple "on/off" devices.

The Dangers of Excessive Heat
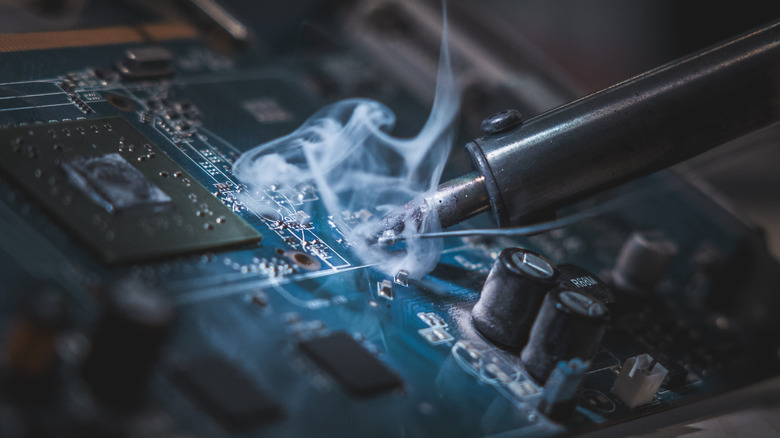
When an iron is set too high, you risk more than just burned fingers. Excessive heat can strip away the protective flux core within the solder, causing it to evaporate before it can clean the joint. Furthermore, it accelerates the oxidation of the iron’s tip, effectively insulating it and making future heat transfer inefficient. Most critically, excessive heat can cause "lifting" of the delicate copper traces on a printed circuit board (PCB), causing permanent damage to the substrate.
The Perils of Under-Heating
Conversely, a cold iron is equally destructive. If the iron does not reach a sufficient temperature to melt the solder quickly, you are forced to hold the iron against the components for an extended duration. This "soaking" effect transfers heat into the sensitive electronic parts, often destroying integrated circuits or capacitors long before the solder flows. The resulting joint is often "cold"—a dull, gray, and brittle connection that may conduct electricity initially but will inevitably fail due to thermal expansion or mechanical vibration.
Optimal Thermal Management
While every project differs, the general rule of thumb for standard leaded solder is an iron temperature between 660°F and 750°F (350°C–400°C). However, you must calibrate this based on the thermal mass of the joint. Large ground planes require more heat than small surface-mount resistors. Learning to "feel" the joint—observing how the solder flows—is a skill that replaces rigid adherence to a single number.

2. Process Misconceptions: Heating the Solder vs. the Component
A frequent amateur mistake is the attempt to "paint" solder onto a joint by melting it directly on the iron’s tip and transferring it. This approach is fundamentally flawed and is the primary cause of unreliable, "cold" solder joints.
Why Pre-loading the Tip Fails
When you melt solder on the iron first, the flux—which is designed to clean the metal surfaces—burns off into the air before it reaches the component. Furthermore, when that pre-melted blob touches a cold component, it cools instantly, creating a surface bond rather than a metallurgical one. These joints often appear shiny on the surface but are disconnected from the lead, leading to intermittent signal failures that are notoriously difficult to diagnose.
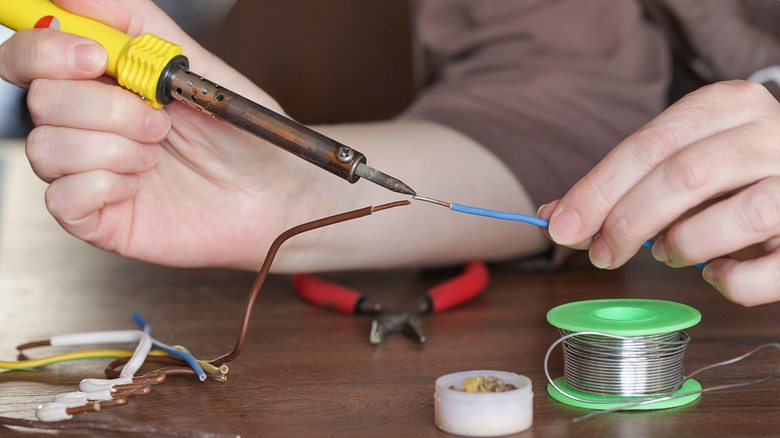
The Correct Methodology: Heat the Joint
To achieve a professional-grade bond, you must apply the tip of the iron to the junction where the component lead meets the pad. Wait two to three seconds for the metal to reach the necessary temperature. Only then should you feed the solder wire into the joint—not the iron. The heat from the components themselves should melt the solder, ensuring it flows into the gaps via capillary action, creating a uniform, "fillet" shape that provides both electrical conductivity and structural strength.
3. Maintenance Protocols: Failing to Clean and Tin
The interface between your iron and your work is the tip. If that tip is oxidized, covered in carbonized flux, or caked with dirt, it will act as a thermal insulator.
The Necessity of Cleaning
Before every session, and periodically throughout, the tip must be cleaned. A brass wire sponge is the industry standard, as it removes debris without the aggressive thermal shock associated with wet cellulose sponges. A clean, shiny tip is not just for aesthetics; it is a functional requirement for efficient heat transfer.
The Art of "Tinning"
Tinning is the process of coating the tip with a fresh layer of solder after cleaning. This layer acts as a sacrificial barrier, preventing oxygen from attacking the base metal of the tip. If you leave an iron hot and un-tinned, you will return to find a black, crusty tip that refuses to melt solder. By keeping the tip "wetted" with a fresh coat of solder, you ensure that the next time you touch it to a component, the heat transfer is instantaneous and uniform.
4. The Critical Cooling Phase: Avoiding Premature Movement
Even with the perfect temperature and the correct technique, a joint can be ruined in the final seconds of the process.
The "Disturbed Joint" Phenomenon
Solder, when molten, is a liquid metal. As it transitions to a solid, it forms a crystalline structure. If the joint is moved, shaken, or even slightly bumped while this transition is occurring, the crystals are fractured. This results in a "disturbed" or "cold" joint, characterized by a grainy, dull finish. These joints are mechanically weak and prone to developing microscopic cracks that expand over time, eventually resulting in an open circuit.
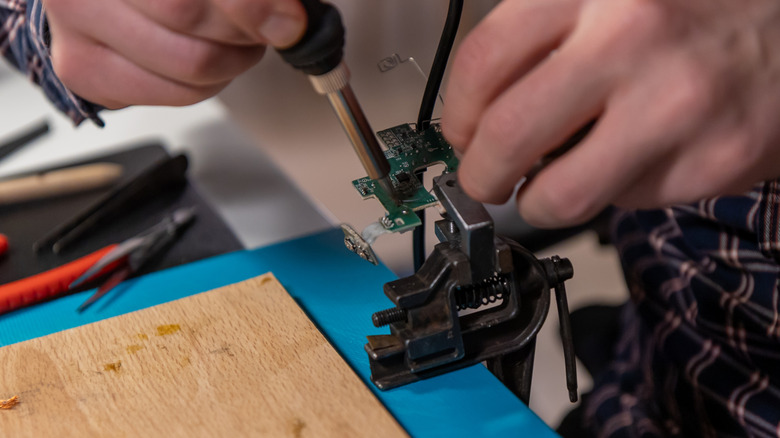
Establishing Stability
To mitigate this, you must keep the components fixed in place until the solder has completely solidified. For complex projects, this necessitates the use of "helping hands"—clamping devices with alligator clips—or specialized PCB holders. A simple rule of thumb: wait at least 10 to 20 seconds after removing the heat source before nudging the component. The solder should appear smooth and bright, indicating a proper, undisturbed crystalline bond.

5. Material Selection: Using the Wrong Kind of Solder
Not all solder is created equal. Using the wrong alloy for your specific application is a recipe for failure.
Categorizing Solder Types
- Electrical Solder: Typically a tin-lead or tin-copper alloy with a flux core. It is optimized for low-resistance connections and rapid melting.
- Plumbing/Jewelry Solder: Often features higher melting points and different chemical compositions designed for structural strength or resistance to corrosion in water, rather than electrical conductivity. Never confuse these with electronics solder.
The Lead vs. Lead-Free Debate
The industry has largely shifted toward lead-free (SAC) solders due to environmental regulations like RoHS. However, lead-free solder has a higher melting point and is more difficult to work with than traditional 60/40 (tin/lead) solder. For prototyping and hobby work, many technicians still prefer leaded solder because it flows better and is more forgiving of temperature fluctuations. Regardless of your choice, ensure the solder is "flux-core." Using solid wire without a flux core requires manual application of external flux, which is an advanced step that beginners should avoid.
Implications for Success
Mastering these five areas—temperature control, proper heating technique, maintenance, stability, and material selection—is the difference between a project that works for a lifetime and one that fails in a week. Soldering is not just about melting metal; it is about ensuring the reliable flow of electricity. By treating the iron with respect, preparing your surfaces meticulously, and allowing the physics of the solder to do the work, you transition from a novice "blob-maker" to a skilled practitioner of a vital electronic craft.
As you progress, remember that every successful joint is a testament to patience. If a joint looks dull or doesn’t flow, don’t force it—clean your tip, check your temperature, and start again. The perfect connection is always worth the extra effort.