
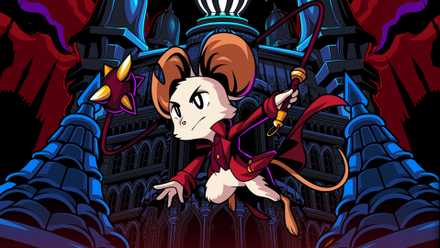
In the unforgiving, gothic landscape of Mina the Hollower—the highly anticipated action-adventure title from the masters at Yacht Club Games—players are quickly reminded that survival is a luxury, not a guarantee. From the moment the game begins, Mina is presented as a vulnerable protagonist. She possesses a limited health pool, relies on a "rally" system to reclaim lost vitality through offensive aggression, and faces a menagerie of lethal foes that can dismantle the unprepared in seconds.
While character leveling provides a baseline of increased durability, the true secret to turning the tides of battle lies within the game’s deep, customizable trinket system. These artifacts offer transformative passive abilities that can elevate a struggling player into an unstoppable force. Whether you are navigating the treacherous platforming traps of the Shanty Swamp or standing toe-to-toe with the game’s most punishing bosses, selecting the right gear is paramount.
Below, we analyze the ten most effective trinkets in Mina the Hollower, detailing their origins, their strategic applications, and why they are essential for your survival in the Hallow.

The Strategic Foundation of Trinkets
The trinket system is the backbone of character expression in Mina the Hollower. While the base combat loop focuses on precise movement and timing, trinkets allow players to mitigate the harsh penalties of failure. By combining specific items, players can create "synergy builds" that bypass the game’s most difficult hurdles, such as the punishing health-loss mechanics or complex traversal sequences.
The following items are not merely helpful; they are fundamental components of a high-level playstyle. They are categorized here based on their impact on survivability, damage output, and utility, providing a roadmap for those looking to master the game’s challenging late-game content.
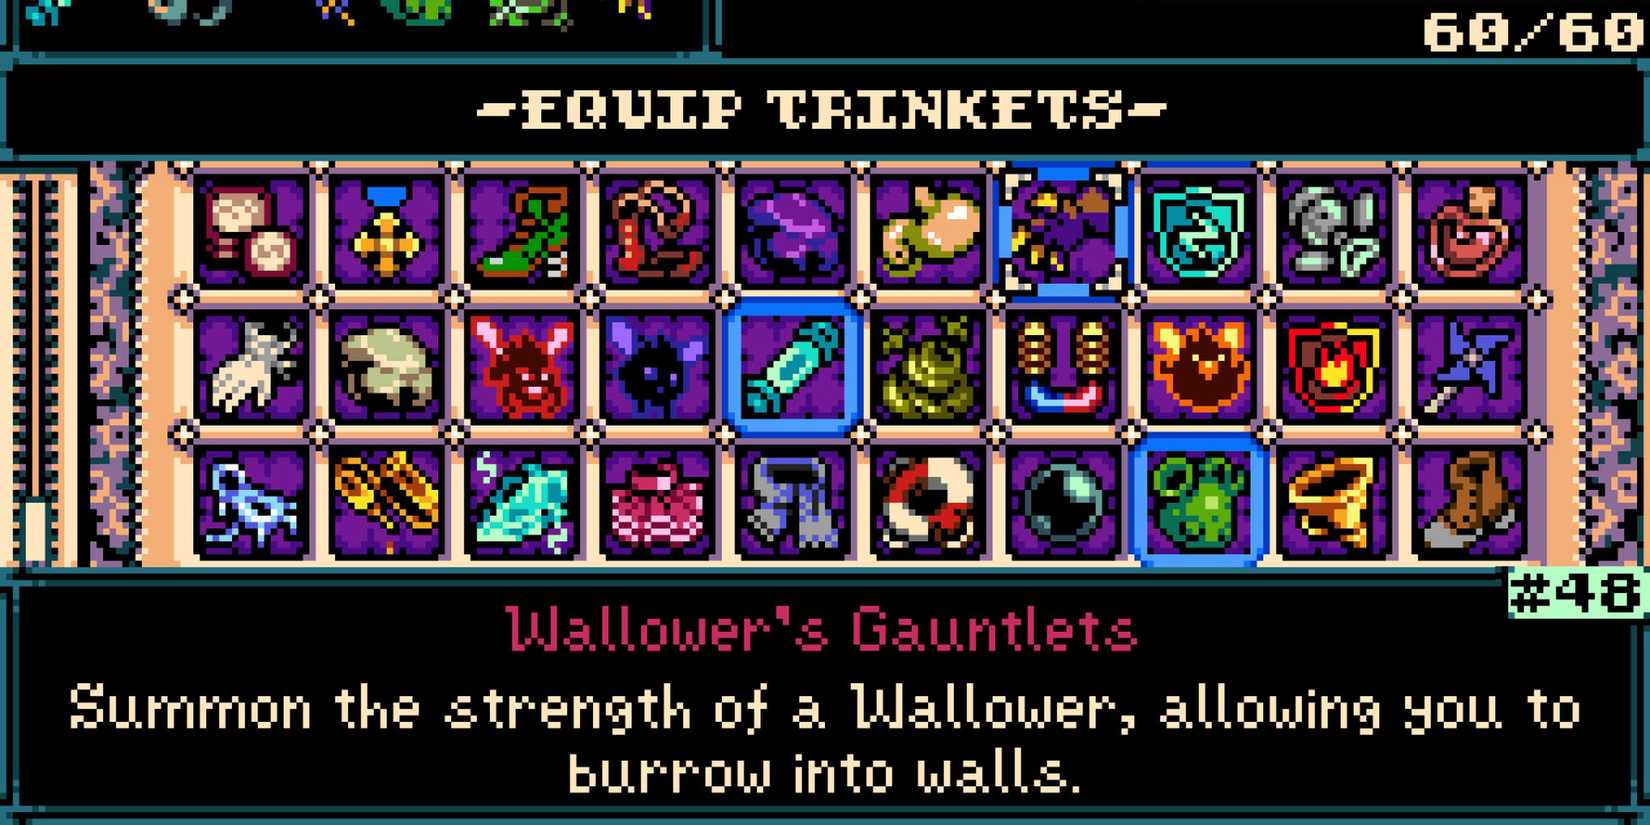
10. Wallower’s Gauntlets: Defying the Environment
Primary Utility: Traversal and Evasion

Found within a chest to the southeast of Kindlewood in the Septemburg region, the Wallower’s Gauntlets are a game-changer for players struggling with the game’s verticality. At their core, these gauntlets grant Mina the ability to burrow directly into walls and travel along them.
While initially perceived as a niche mobility tool, their true power lies in their ability to trivialize platforming challenges. By stalling on vertical surfaces, players can bypass moving platforms or safely cross massive chasms that would otherwise require frame-perfect jumping. When paired with the Drill Driver, the gauntlets allow players to effectively "sequence break" many of the game’s more tedious traversal sections. For those facing environmental hazards, pairing this with the Iron Lung trinket allows for extended burrowing time, effectively turning the game’s most dangerous pits into simple, manageable obstacles.
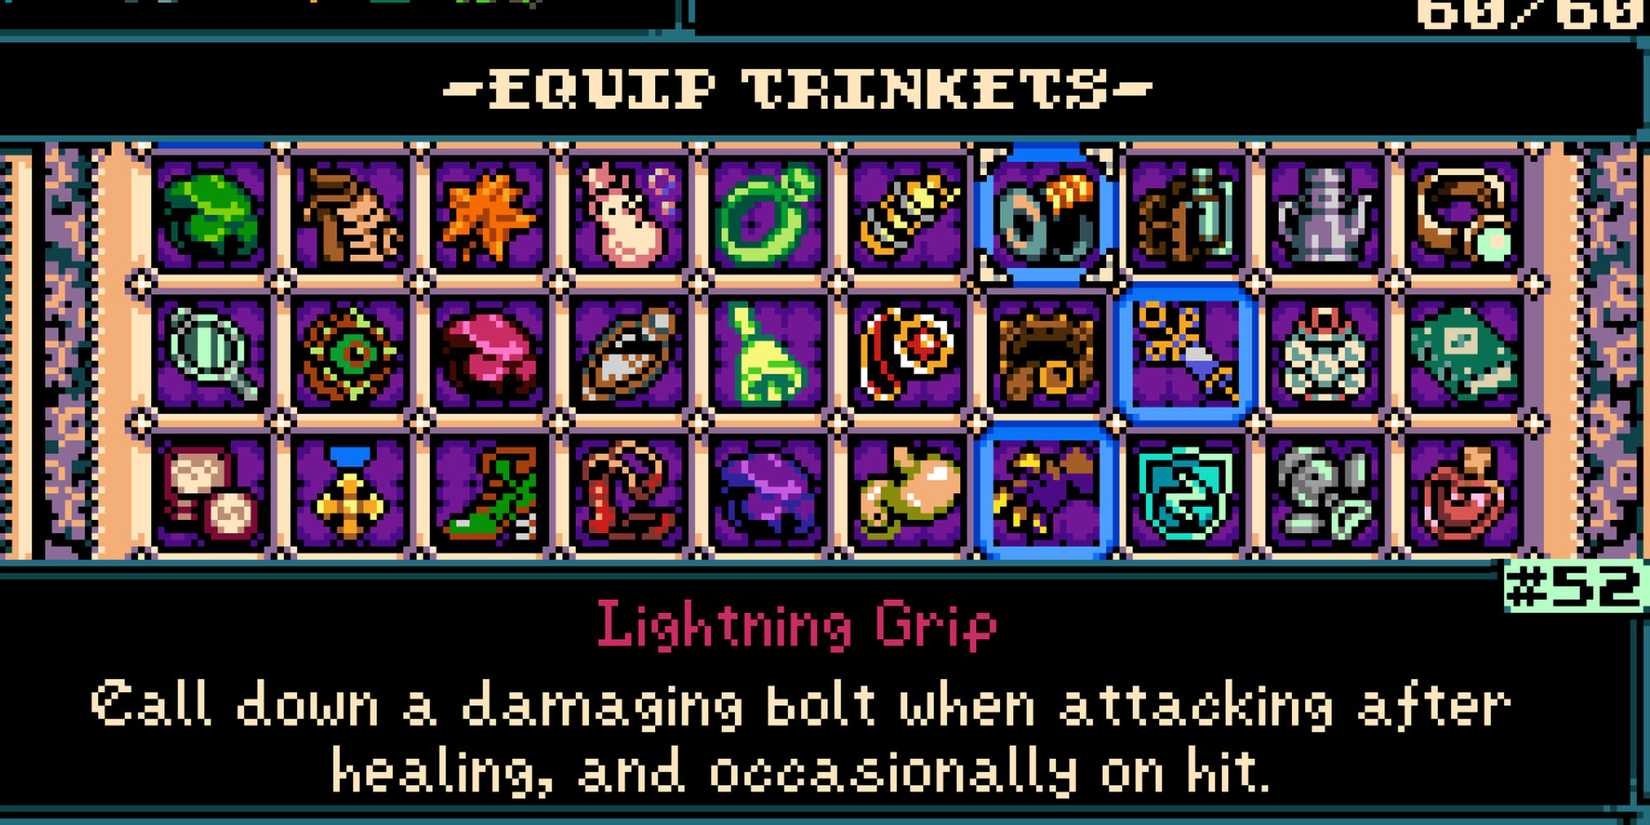
9. Lightning Grip: Offensive Synergy
Primary Utility: Damage Amplification
Obtainable in Septemburg by completing the side-quest involving the four children near the Kindlewood school, or via purchase at the Ossex trinket shop, the Lightning Grip is a mandatory pick for aggressive players.
The mechanism is straightforward yet lethal: every time Mina heals or sustains damage, the grip summons a localized lightning strike against nearby enemies. Because the bolt targets the first enemy struck by your main weapon, it provides a degree of precision that allows for significant "burst" damage. This trinket rewards those who play with a high-risk, high-reward mindset. By deliberately taking chip damage to prime the lightning, players can force an aggressive momentum that keeps bosses on the defensive.
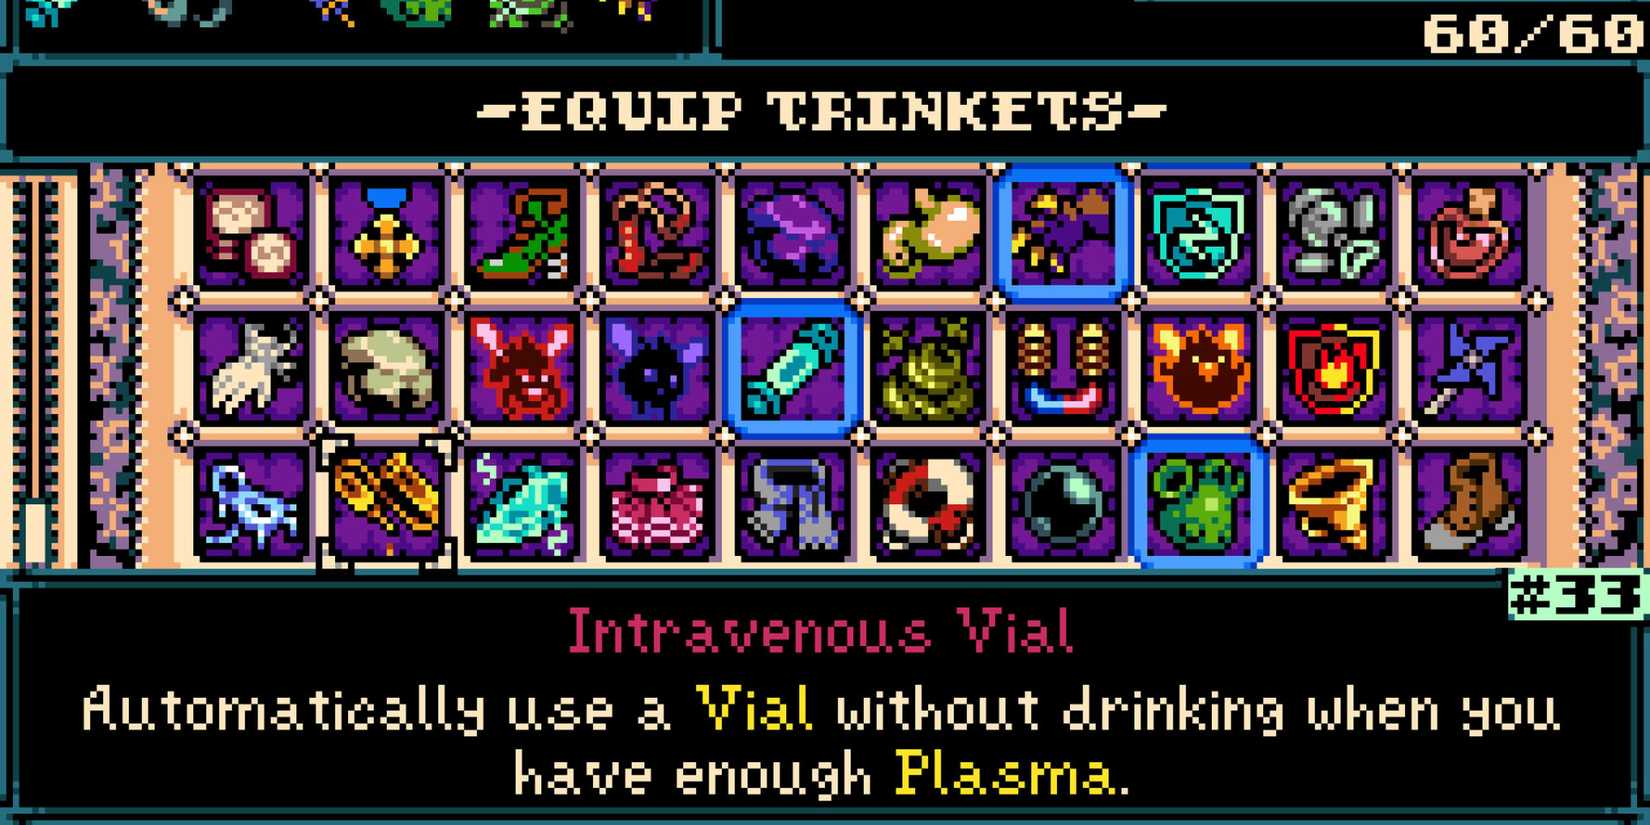
8. Intravenous Vial: Automated Survival
Primary Utility: Healing Efficiency
Healing in Mina the Hollower is a high-stakes endeavor. It requires the player to successfully land hits to generate plasma, then find a window of vulnerability to initiate the healing animation—an animation that can easily lead to further damage if interrupted.
The Intravenous Vial, available for purchase at the Ossex shop, eliminates this tension. When Mina’s health drops to critical levels, the vial triggers an automatic heal, bypassing the lengthy animation. This allows the player to remain mobile, focusing entirely on evasion while their health restores. While it can occasionally trigger during suboptimal moments, the trade-off—avoiding a death-blow—is universally worth the risk, especially when paired with other defensive trinkets.
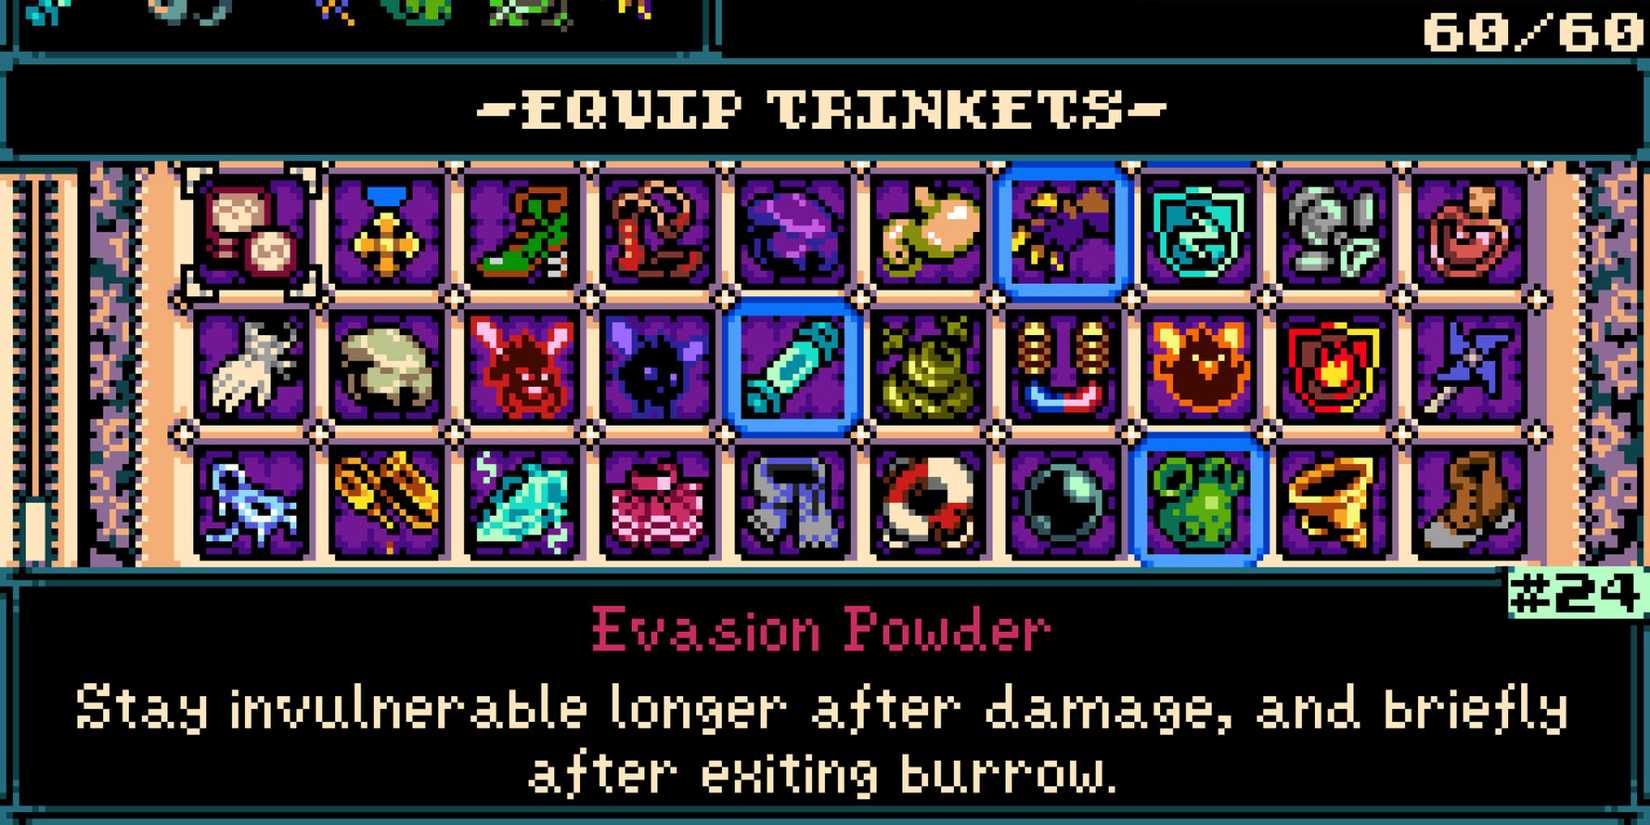
7. Evasion Powder: The Art of Invulnerability
Primary Utility: Defensive Frame Manipulation
Acquired by "borrowing" a ladder from Pinky the Gorilla in the Shanty Swamp, the Evasion Powder is arguably the most powerful defensive tool in the game. When equipped, it increases the duration of invulnerability frames (i-frames) after taking damage, and, more importantly, grants i-frames upon exiting a burrow.
Because there is no cooldown on this effect, skilled players can effectively become untouchable. By incorporating frequent, short-duration burrows into their combat rotation, players can weave through boss attack patterns that would otherwise be impossible to dodge. It is the ultimate tool for those who prefer a "hit-and-run" strategy, turning the burrowing mechanic from a traversal tool into a defensive masterclass.
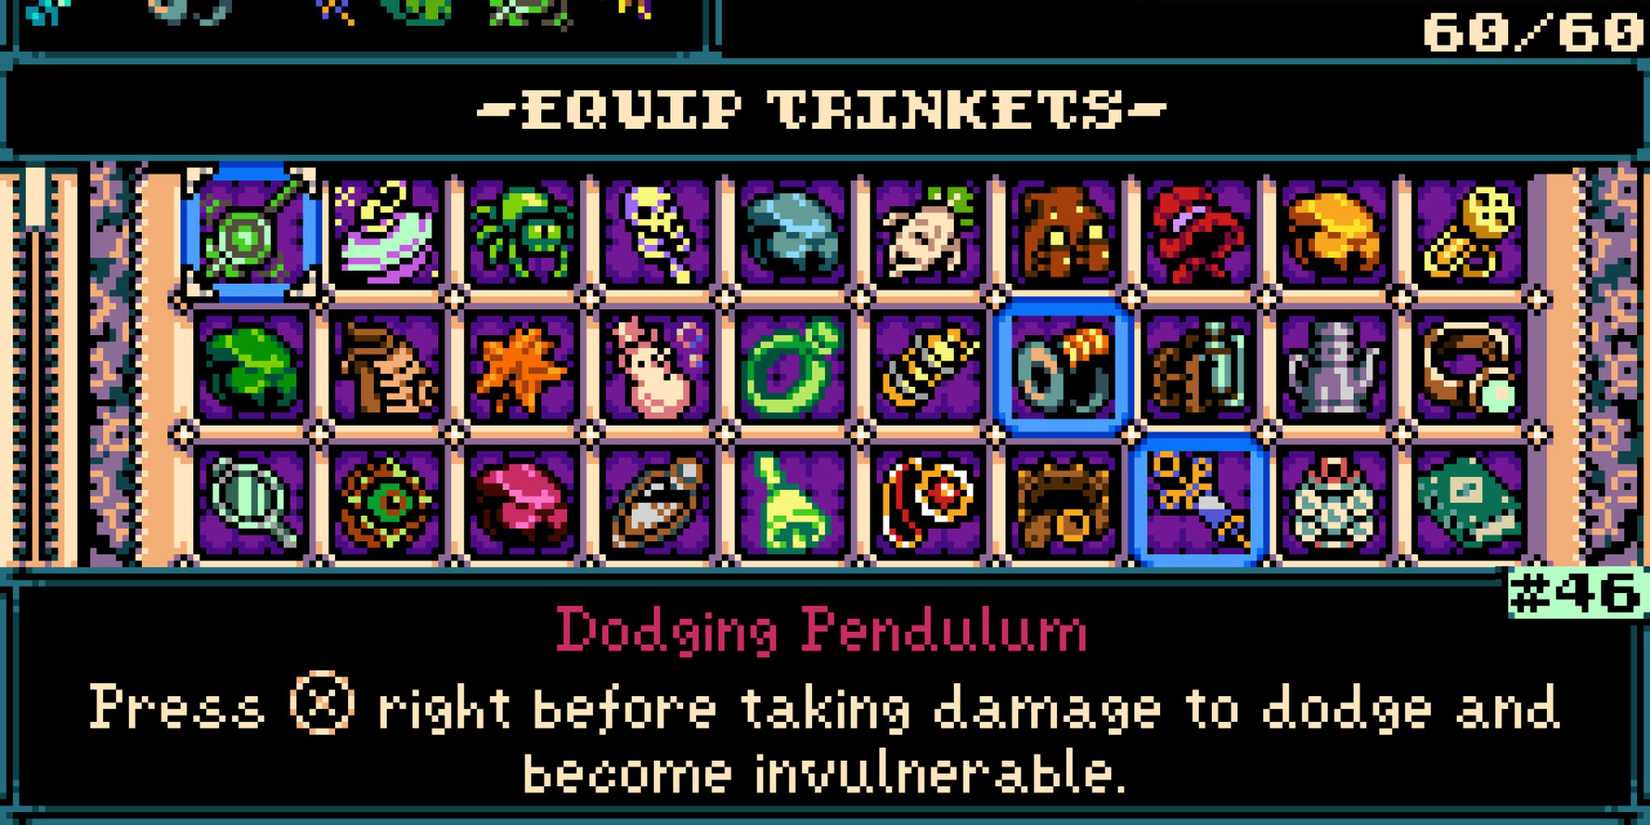
6. Dodging Pendulum: Mastering the Perfect Counter
Primary Utility: Defensive Counter-Attack
Normally obtained near the end of the game, the Dodging Pendulum can be purchased early from Panino’s Station Underside shop for a significant sum. Despite the cost, it is the best investment a player can make.
The Pendulum grants the ability to perform a "perfect dodge" by jumping exactly as an enemy attack lands. This triggers a localized time-slow effect, granting the player a massive window to either reposition or launch a devastating counter-attack. The timing window is surprisingly generous, making it accessible to players of all skill levels. Once mastered, you will find yourself intentionally baiting attacks just to trigger the slow-motion effect, effectively turning every boss fight into a rhythmic dance.
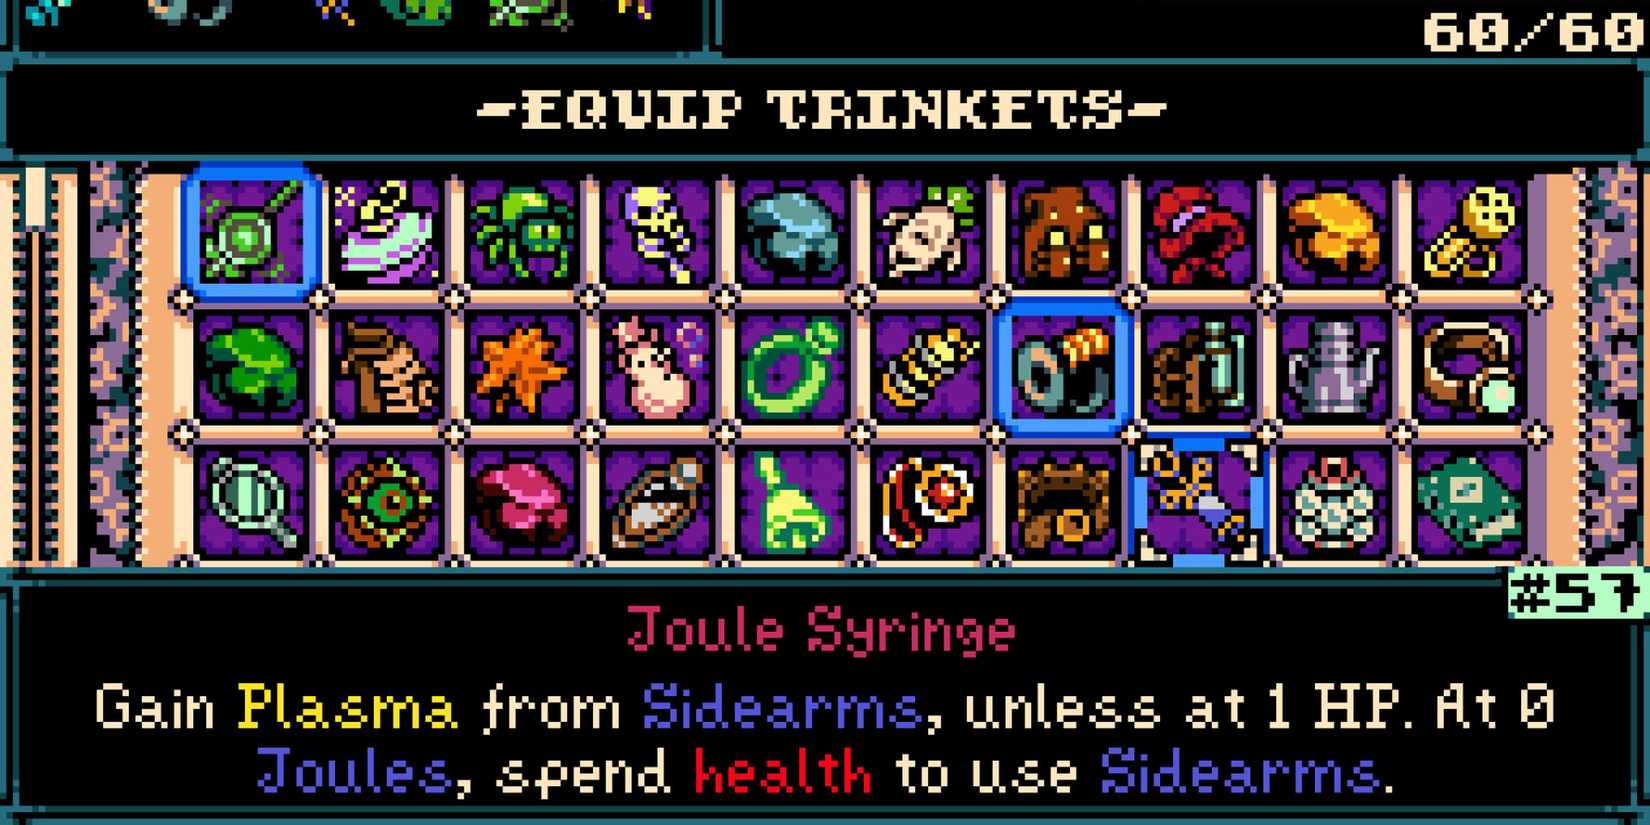
5. Joule Syringe: Ranged Plasma Harvesting
Primary Utility: Resource Management
Located on an isolated island in Bone Beach, the Joule Syringe is the ultimate utility item for players who struggle with the "rally" system. It allows Mina to collect plasma by dealing damage with sidearms, rather than being forced into melee range.
This removes the need to constantly risk your health to refill your healing pool. By using the syringe in tandem with ranged sidearms, you can maintain your health bar from a distance, safely harvesting plasma and ensuring you always have a "safety net" ready. It is a fundamental item for any player attempting a "no-hit" or high-difficulty run.
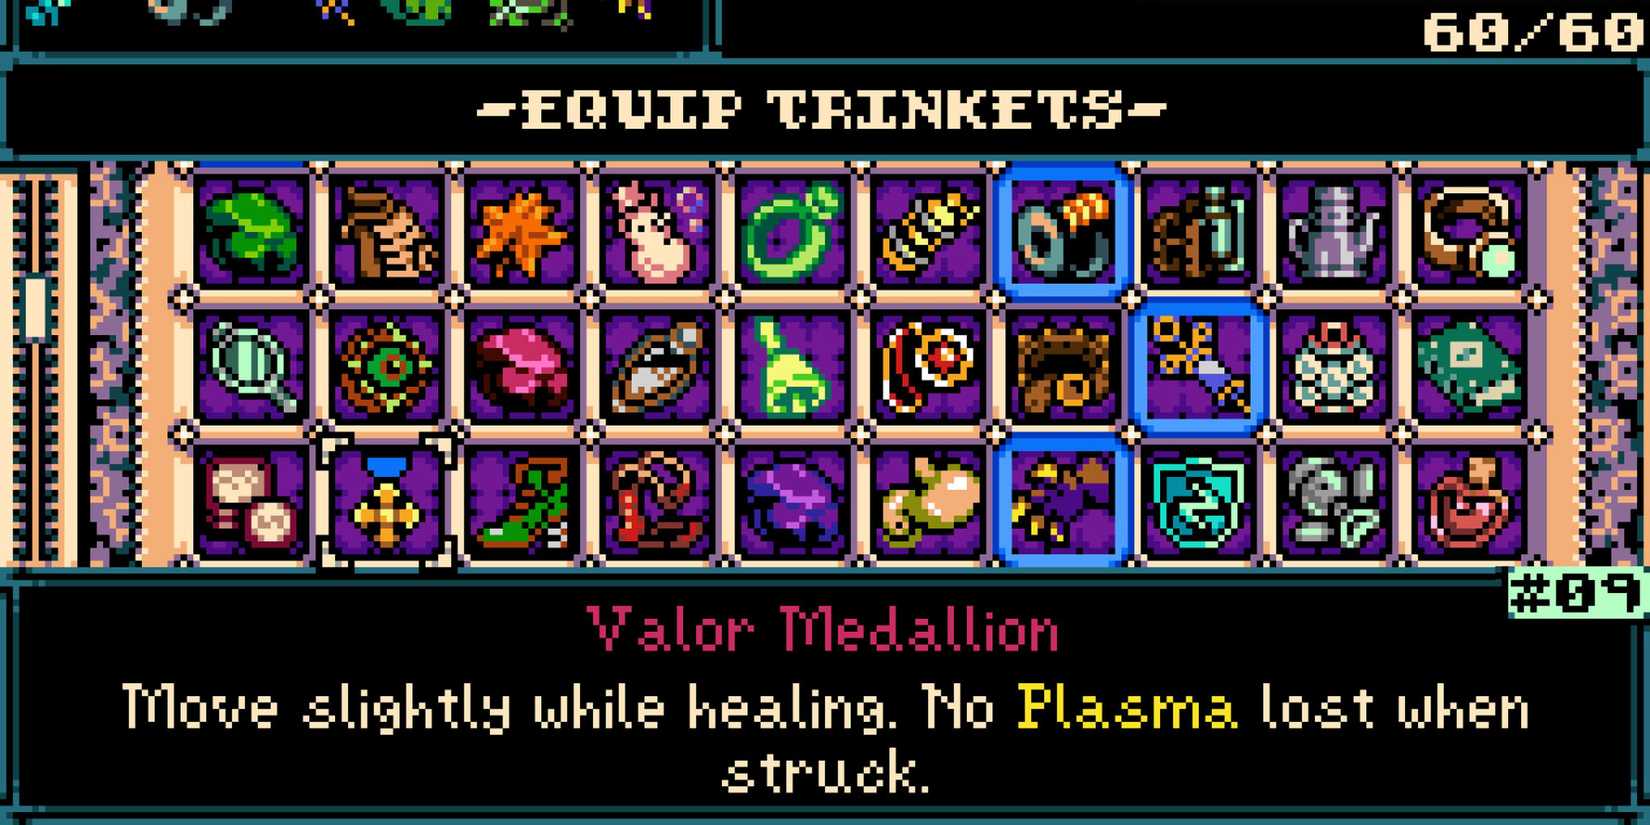
4. Valor Medallion: Risk-Free Aggression
Primary Utility: Resource Retention
Aggressive play in Mina the Hollower usually comes with a penalty: taking damage drains your health and depletes your accumulated plasma. The Valor Medallion, found via Furl in Ossex, removes this penalty entirely.
With this trinket equipped, you retain all your plasma even after taking a hit. This effectively nullifies the disadvantage of close-quarters combat, allowing you to use your most powerful melee weapons without the fear of being "double-punished" for a single mistake. It is the best item for players learning boss patterns, as it turns every engagement into a sustainable battle of attrition.
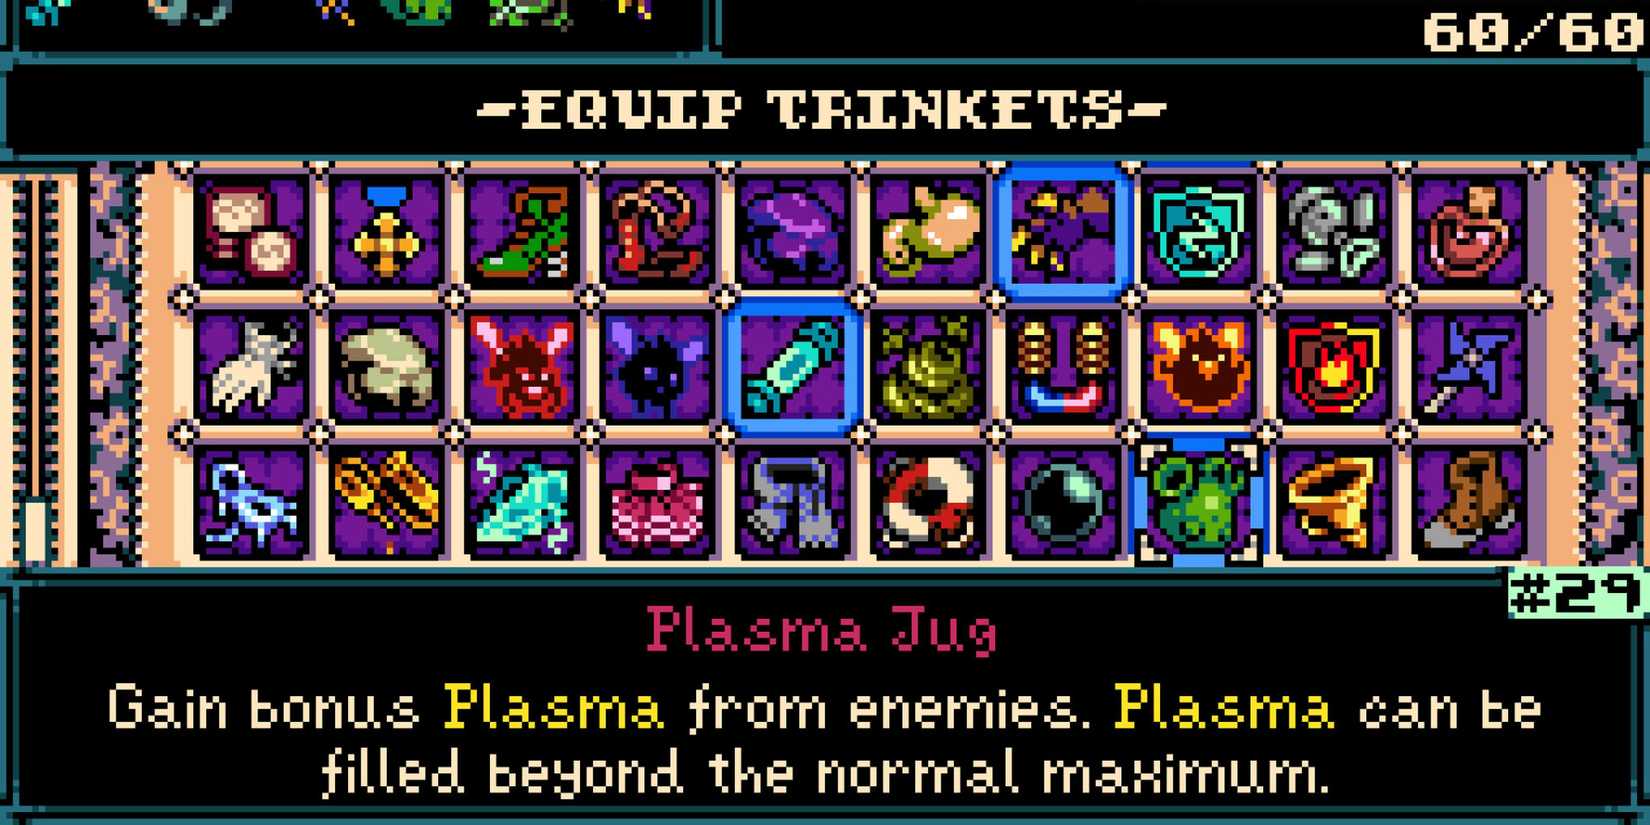
3. Plasma Jug: The Emergency Reserve
Primary Utility: Sustainability

The Plasma Jug, earned by completing the quest for the giant frog at the Shanty Swamp entrance, allows players to bank extra plasma even when at full health.
This is an essential "insurance" item. By keeping a full reserve of plasma stored in the jug, you are prepared for sudden boss transitions or surprise encounters. When combined with the Joule Syringe and Valor Medallion, you create a "healing loop" that makes death a rarity, allowing you to focus on the game’s narrative and exploration rather than constant health management.
2. Willow the Wisp: The DPS King
Primary Utility: Damage Output
Purchasable from Poppin’s shop in Eastern Heath for a modest 400 bones, Willow the Wisp is perhaps the most deceptive item in the game. Its low cost might lead players to believe it is a minor buff, but it is actually the highest damage-boosting trinket available.
It not only boosts Mina’s base attack power but also nearly doubles her attack rate. This allows for constant, unrelenting pressure. Enemies that rely on staggered movement are rendered useless as they are caught in a permanent stunlock. For players looking to end boss fights in under a minute, this is the essential choice.
1. Proto Spark: The Ultimate Insurance
Primary Utility: Resurrection
Obtained after the somber events in the Queensbury Crypt, the Proto Spark is the game’s "second chance" mechanic. It resurrects Mina once after a fatal blow, regardless of the source.
While its utility fades slightly as players grow more skilled, it is an indispensable tool for long gauntlets and difficult platforming sections where save points are sparse. It serves as a necessary safety net for the game’s secret locations, such as "Mina’s Grave," where the difficulty spikes significantly. For the average player, the Proto Spark represents the difference between a successful run and the frustration of losing hours of progress.
Implications for the Player Experience
The beauty of Mina the Hollower lies in its flexibility. While the ten items listed above provide the most consistent paths to victory, they are not the only viable options. The trinket system encourages discovery and experimentation.
As you progress through the game, you will find that specific combinations—such as the "Infinite Rally" build using the Valor Medallion and Joule Syringe—can completely change the feel of the combat. We encourage players to step outside their comfort zones. Whether you choose to prioritize defensive resilience or raw, unbridled offensive power, the Hallow is yours to conquer. Trial and error are not just mechanics in Mina the Hollower; they are the very essence of the journey. Embrace the challenge, equip your trinkets, and prepare to face the darkness head-on.